These are not actually “glass” paintings, since I’ve done them on OHP sheets. Yes, the one used to separate pages in record books. I got this idea from the Malayalam magazine Vanita and found it useful for a beginner like me. The only drawback that I found with using this sheet is that larger paintings cannot be done since these sheets come in one standard A4 size.Two designs were traced from the hobby ideas book, the bird from a crayons box, the diya was our rangoli design at school (we won the first prize that year :)) and the ladies was my own art. For the coloring I made use of solvent based glass paints. This being my beginning in glass painting, I didn’t want to spend too much on the framing and did them myself using cardboard.
Sunday, July 25, 2010
Sunday, July 11, 2010
Monday, June 28, 2010
Rock Garden Waterfall
 This was done as part of my newly found interest in gardening and
landscaping. We’d bought a few plants for our balcony and I wanted something
creative and colorful to go along with them. Since my first idea is always to
create something myself before looking up to professional services, I started
drafting the process of making this artificial water(less) body. As always, my
base material for the entire project was newspaper. I made rocks out of
unevenly folded newspaper chunks and the fence with newspaper rolls. The base
for the entire set of rocks was a cereal box cut into a corner-fit shape. Painting
was done with the main intention of making it as much life-like as possible,
but the water part proved difficult since I wanted it to have a 3D effect as
well. I made use of cling film and painted over it for the flowy effect, but
that didn’t turn out as expected. Nevertheless, the entire product did finally
add color and creativity to our balcony. But alas, actual water in the form of
rain ruined my artificial waterfall! :(
This was done as part of my newly found interest in gardening and
landscaping. We’d bought a few plants for our balcony and I wanted something
creative and colorful to go along with them. Since my first idea is always to
create something myself before looking up to professional services, I started
drafting the process of making this artificial water(less) body. As always, my
base material for the entire project was newspaper. I made rocks out of
unevenly folded newspaper chunks and the fence with newspaper rolls. The base
for the entire set of rocks was a cereal box cut into a corner-fit shape. Painting
was done with the main intention of making it as much life-like as possible,
but the water part proved difficult since I wanted it to have a 3D effect as
well. I made use of cling film and painted over it for the flowy effect, but
that didn’t turn out as expected. Nevertheless, the entire product did finally
add color and creativity to our balcony. But alas, actual water in the form of
rain ruined my artificial waterfall! :(Saturday, June 19, 2010
Tuesday, June 15, 2010
Utility Stands

My elder sister has all of a sudden developed this craze for
bangles! Luckily for me, she gave me an order to think of making a stand for
her latest collection and this is what I came up with. Like always, my base for
the entire stand was newspaper and metal wire. Unfortunately, this was not
sturdy enough to hold her glass bangles and they would always topple off! :( hmmm…I should’ve made a stronger base structure.

My mother and sister have stainless steel
and plastic stands adorning their kitchens. I wanted one too and that is how I decided to
make one of my own. It was actually not that difficult! I used old cardboard
boxes of cereals, shoe boxes and the like as the different sections of the
stand, joined them with fevicol, gave them a wooden textured paint effect and decorated
them with dried water melon seeds. Now, that is truly eco-friendly! Unfortunately though, this did not last long
since the boxes could not withstand sufficient weight and gradually began to
sag :(
Thursday, May 20, 2010
My Own Letter Box at Home
 I opened my own savings account at home, without having to walk into any bank branch and without filling up any form! A little help from Neil was all that I needed. :D
I had this project in mind when I visited my parents in Kerala. Luckily for me, I found an old, empty Pringles tin there along with my mother’s collection of “additional” utensils. Once I was back at home, I started working on it. There were not many steps to creating this letter box. It only required making a slot to push the money through and some corrugated sheet for the base. The top of the letter box is a newspaper ball carefully stuck to the lid of the tin. After taping everything securely into position, the next step was covering the tin and lid separately in 1-2 layers of paper mache (fevicol + tissue paper pieces). When completely dry, I painted the top portion and the corrugated sheet at the bottom black and red for the middle portion. There seemed to be some mistake in the coloring and I went and checked my nephew’s little metal letter box that he recently got. And then I found my mistake…the top portion was supposed to be red and not black like I’d done. I made the correction the very next day and gave it 2-3 coatings of red and black. A black band made of newspaper separated the top and middle portions later on. And there it is…my very own savings account at home, and I’ve already transferred my “Vishu” savings to this! :)
Check out the original version by Neil Buchanan here
http://www.hitentertainment.com/ARTATTACk/pocketmoneybox.html
Wednesday, May 12, 2010
My Creations at Home in Kerala
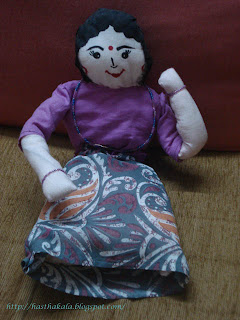
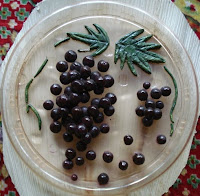
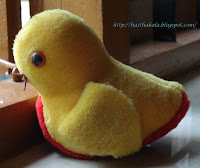
This time when I visited my parents, I took my camera along to click pictures of whatever was remaining of my earlier crafts. Here they are:
Subscribe to:
Posts (Atom)


